So here we go...
What you will need
- At least one half a yard/metre of fabric (I used 100% cotton)
- A sewing machine or if you have not got one you can hand sew it but make sure to sew tight stitches so it does not fall apart.
- A scissors
- Thread
- Measuring Tape
- Loop Turner to turn fabric inside out, again if you do not have one of these you can use your hands
- Aluminium Wire (The type that bends easily)
Firstly,
Measure your head: Get your measuring tape and wrap it around your head the way your would tie your headband around. When you have your head measured add an extra 5 inches on and this will make it long enough to bend. I measure the length to about 30 inches in total without seam allowance but it all depends on head size really.
Next cut out your fabric: Please not before cutting your fabric you want to add 5/8" seam allowance. Cut your fabric on the fold to the shape in the image. Cut it so that you have each end curved to give shape to the bow part of the headband.
This is what it will look like when you open it up, see image below.
Now you need to start sewing your headband together. You want to turn the fabric around and sew the faded part together so that when you turn it inside out you have the right side of the fabric showing as your headband. Leave an inch roughly in the middle unsewed and open so that you can turn the fabric inside out with the Loop Turner. See images below.
Now get sewing :)
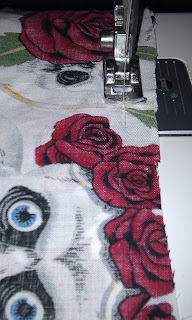
Here I am sewing the 5/8" seam allowance I allowed for when cutting the fabric out
Gap left to turn the fabric inside out
Now trim down the edges so there is no excess unnecessary fabric.
Take your Loop Turner
Place it through the hole you left unsewed and push to one end of the headband and hook the material onto the Loop Turner like the image below.
Then start pulling the Loop Turner downwards while pushing the fabric up so you can pull the Loop Turner that is hooked to the fabric out of the hole you left in the middle of the fabric. This will help you pull the fabric out and turn it inside out.
Like so..
Do the same to the other end of the headband pull it through the hole and your headband will be turned inside out.
Now you want to Iron your seams flat.
Apologies for the weird shadow going through these two images, I think my camera just had a malfunction.
Now you can insert your wire through the hole in the middle you left unsewed.
Measure your wire to the same measurement as your headband length but you can add 2cm on each end so that you can bend it over like the image above. By bending the end of the wire it prevents it tearing through the headband. Then push the wire into your headband fabric.
After your put your wire in you can bend it back straight so that it hits each end and you have the perfect amount of wire to twist once your headband is done.
Finally, seal the hole in the middle by sewing it closed.
Et voila!
Here are some I made earlier. Happy Sewing <3


can you make it for me please
ReplyDeleteApologies Jessica, I have only seen your comment now. You can purchase my headbands on www.pinmeupireland.com and if you would like to request a custom made one please contact me through my facebook page www.facebook.com/pinmeupireland
DeleteApologies Jessica, I have only seen your comment now. You can purchase my headbands on www.pinmeupireland.com and if you would like to request a custom made one please contact me through my facebook page www.facebook.com/pinmeupireland
ReplyDelete